
That’s what robots meta tags and the x-robots-tag HTTP header are for.
Let’s get one thing straight from the beginning. You can’t control indexation with robots.txt. That’s a common misconception.
The noindex rule in robots.txt was never officially supported by Google. And in July 2019, it was officially deprecated.

A robots meta tag is an HTML snippet that tells search engine robots what they can and cannot do on a certain page. It lets you control crawling, indexing and how information from that page is displayed in the search results. It’s placed into the <head> section of a webpage.
Example
<meta name="robots" content="noindex, nofollow">
The meta robots tag is commonly used to prevent pages showing up in search results, although it does have other uses (more on those later).
There are various types of content that you might want to prevent search engines from indexing:
- Thin pages with little or no value for the user;
- Pages in the staging environment;
- Admin and thank-you pages;
- Internal search results;
- PPC landing pages;
- Pages about upcoming promotions, contests or product launches;
- Duplicate content (use canonical tags to suggest the best version for indexing);
Generally, the bigger your website is, the more you’ll deal with managing crawlability and indexation. You also want Google and other search engines to crawl and index your pages as efficiently as possible. Correctly combining page-level directives with robots.txt and sitemaps is crucial for SEO.
Robots meta tags consist of two attributes: name and content.
You must specify values for each of these attributes. Let’s explore what these are.
The name attribute and user-agent values
The name attribute specifies which crawlers should follow these instructions. This value is also known as a user-agent (UA) because crawlers need to be identified with their UA to request a page. Your UA reflects the browser you’re using, but Google’s user-agents are, for example, Googlebot or Googlebot-image.
The UA value “robots” applies to all crawlers. You can also add as many robots meta tags into the <head> section as you need. For example, if you want to prevent your images from showing up in a Google or Bing image search, add the following meta tags:
<meta name="googlebot-image" content="noindex">
<meta name="MSNBot-Media" content="noindex">
The content attribute and crawling/indexing directives
The content attribute provides instructions on how to crawl and index information on the page. If there is no robots meta tag available, crawlers interpret it as index and follow. That gives them permission to show the page in search results and crawl all links on the page (unless stated otherwise with the rel=”nofollow” tag).
The following are the supported values for the content attribute by Google:
all
The default value of “index, follow”, no need to ever use this directive.
<meta name="robots" content="all">
noindex
Instructs search engines not to index the page. That prevents it from showing in search results.
<meta name="robots" content="noindex">
nofollow
Stops robots from crawling all links on the page. Please note that those URLs still may be indexable, especially if they have backlinks pointing to them.
<meta name="robots" content="nofollow">
none
The combination of noindex, nofollow. Avoid using this as other search engines (e.g., Bing) don’t support this.
<meta name="robots" content="none">
noarchive
Prevents Google from showing a cached copy of the page in the SERP.
<meta name="robots" content="noarchive">
notranslate
Prevents Google from offering a translation of the page in the SERP.
<meta name="robots" content="notranslate">
noimageindex
Prevents Google from indexing images embedded on the page.
<meta name="robots" content="noimageindex">
unavailable_after:
Tells Google not to show a page in search results after a specified date/time. Basically a noindex directive with a timer. The date/time must be specified using the RFC 850 format.
<meta name="robots" content="unavailable_after: Sunday, 01-Sep-19 12:34:56 GMT">
nosnippet
Opts out of all text and video snippets within the SERP. It also works as noarchive at the same time.
<meta name="robots" content="nosnippet">
Since October 2019, Google offers more granular options to control if and how you want to display your snippets in the search results. This is in part due to the European Copyright Directive, which was first implemented by France with its new copyright law.
Crucially, this legislation already affects all website owners. How? Because Google no longer displays snippets (text, image or video) from your site to users in France unless you opt-in using their new robots meta tags.
We discuss how each of these new tags works below. That said, if this concerns your business and you’re looking for a quick solution, add the following HTML snippet to every page on your site to tell Google that you want no restrictions on your snippets:
<meta name="robots" content=”max-snippet:-1, max-image-preview:large, max-video-preview:-1">
Note that if you use Yoast SEO, this piece of code is added automatically on every page unless you added noindex or nosnippet directives.
max-snippet:
Specifies a maximum number of characters Google can show in their text snippets. Using 0 will opt out of the text snippets, -1 declares no limit on the text preview.
The following tag will set up the limit to 160 characters (similar to standard meta description length):
<meta name="robots" content="max-snippet:160">
max-image-preview:
Tells Google if and how big an image it can use for image snippets. This directive has three possible values:
- none no image snippet will be shown
- standard - a default image preview may be shown
- large - the largest possible image preview may be shown
<meta name="robots" content="max-image-preview:large">
Using the large value along with images that are at least 1200px wide is recommended because it increases the likelihood of getting featured in Google Discover.
max-video-preview:
Sets up a maximum number of seconds for a video snippet. As with the text snippet, 0 will opt out completely, -1 places no limits.
The following tag would allow Google to show maximum of 15 seconds:
<meta name="robots" content="max-video-preview:15">
Alongside the new robots directives introduced in October 2019, Google also introduced the data-nosnippet HTML attribute. You can use this to tag parts of text that you don’t want Google to use as a snippet.
This can be done in HTML on div, span, and section elements. The data-nosnippet is considered a boolean attribute, meaning that it’s valid with or without a value.
<p>This is some text in a paragraph that can be shown as a snippet<span data-nosnippet>excluding this part</span></p>
<div data-nosnippet>This will not appear in a snippet</div><div data-nosnippet="true">And neither will this</div>
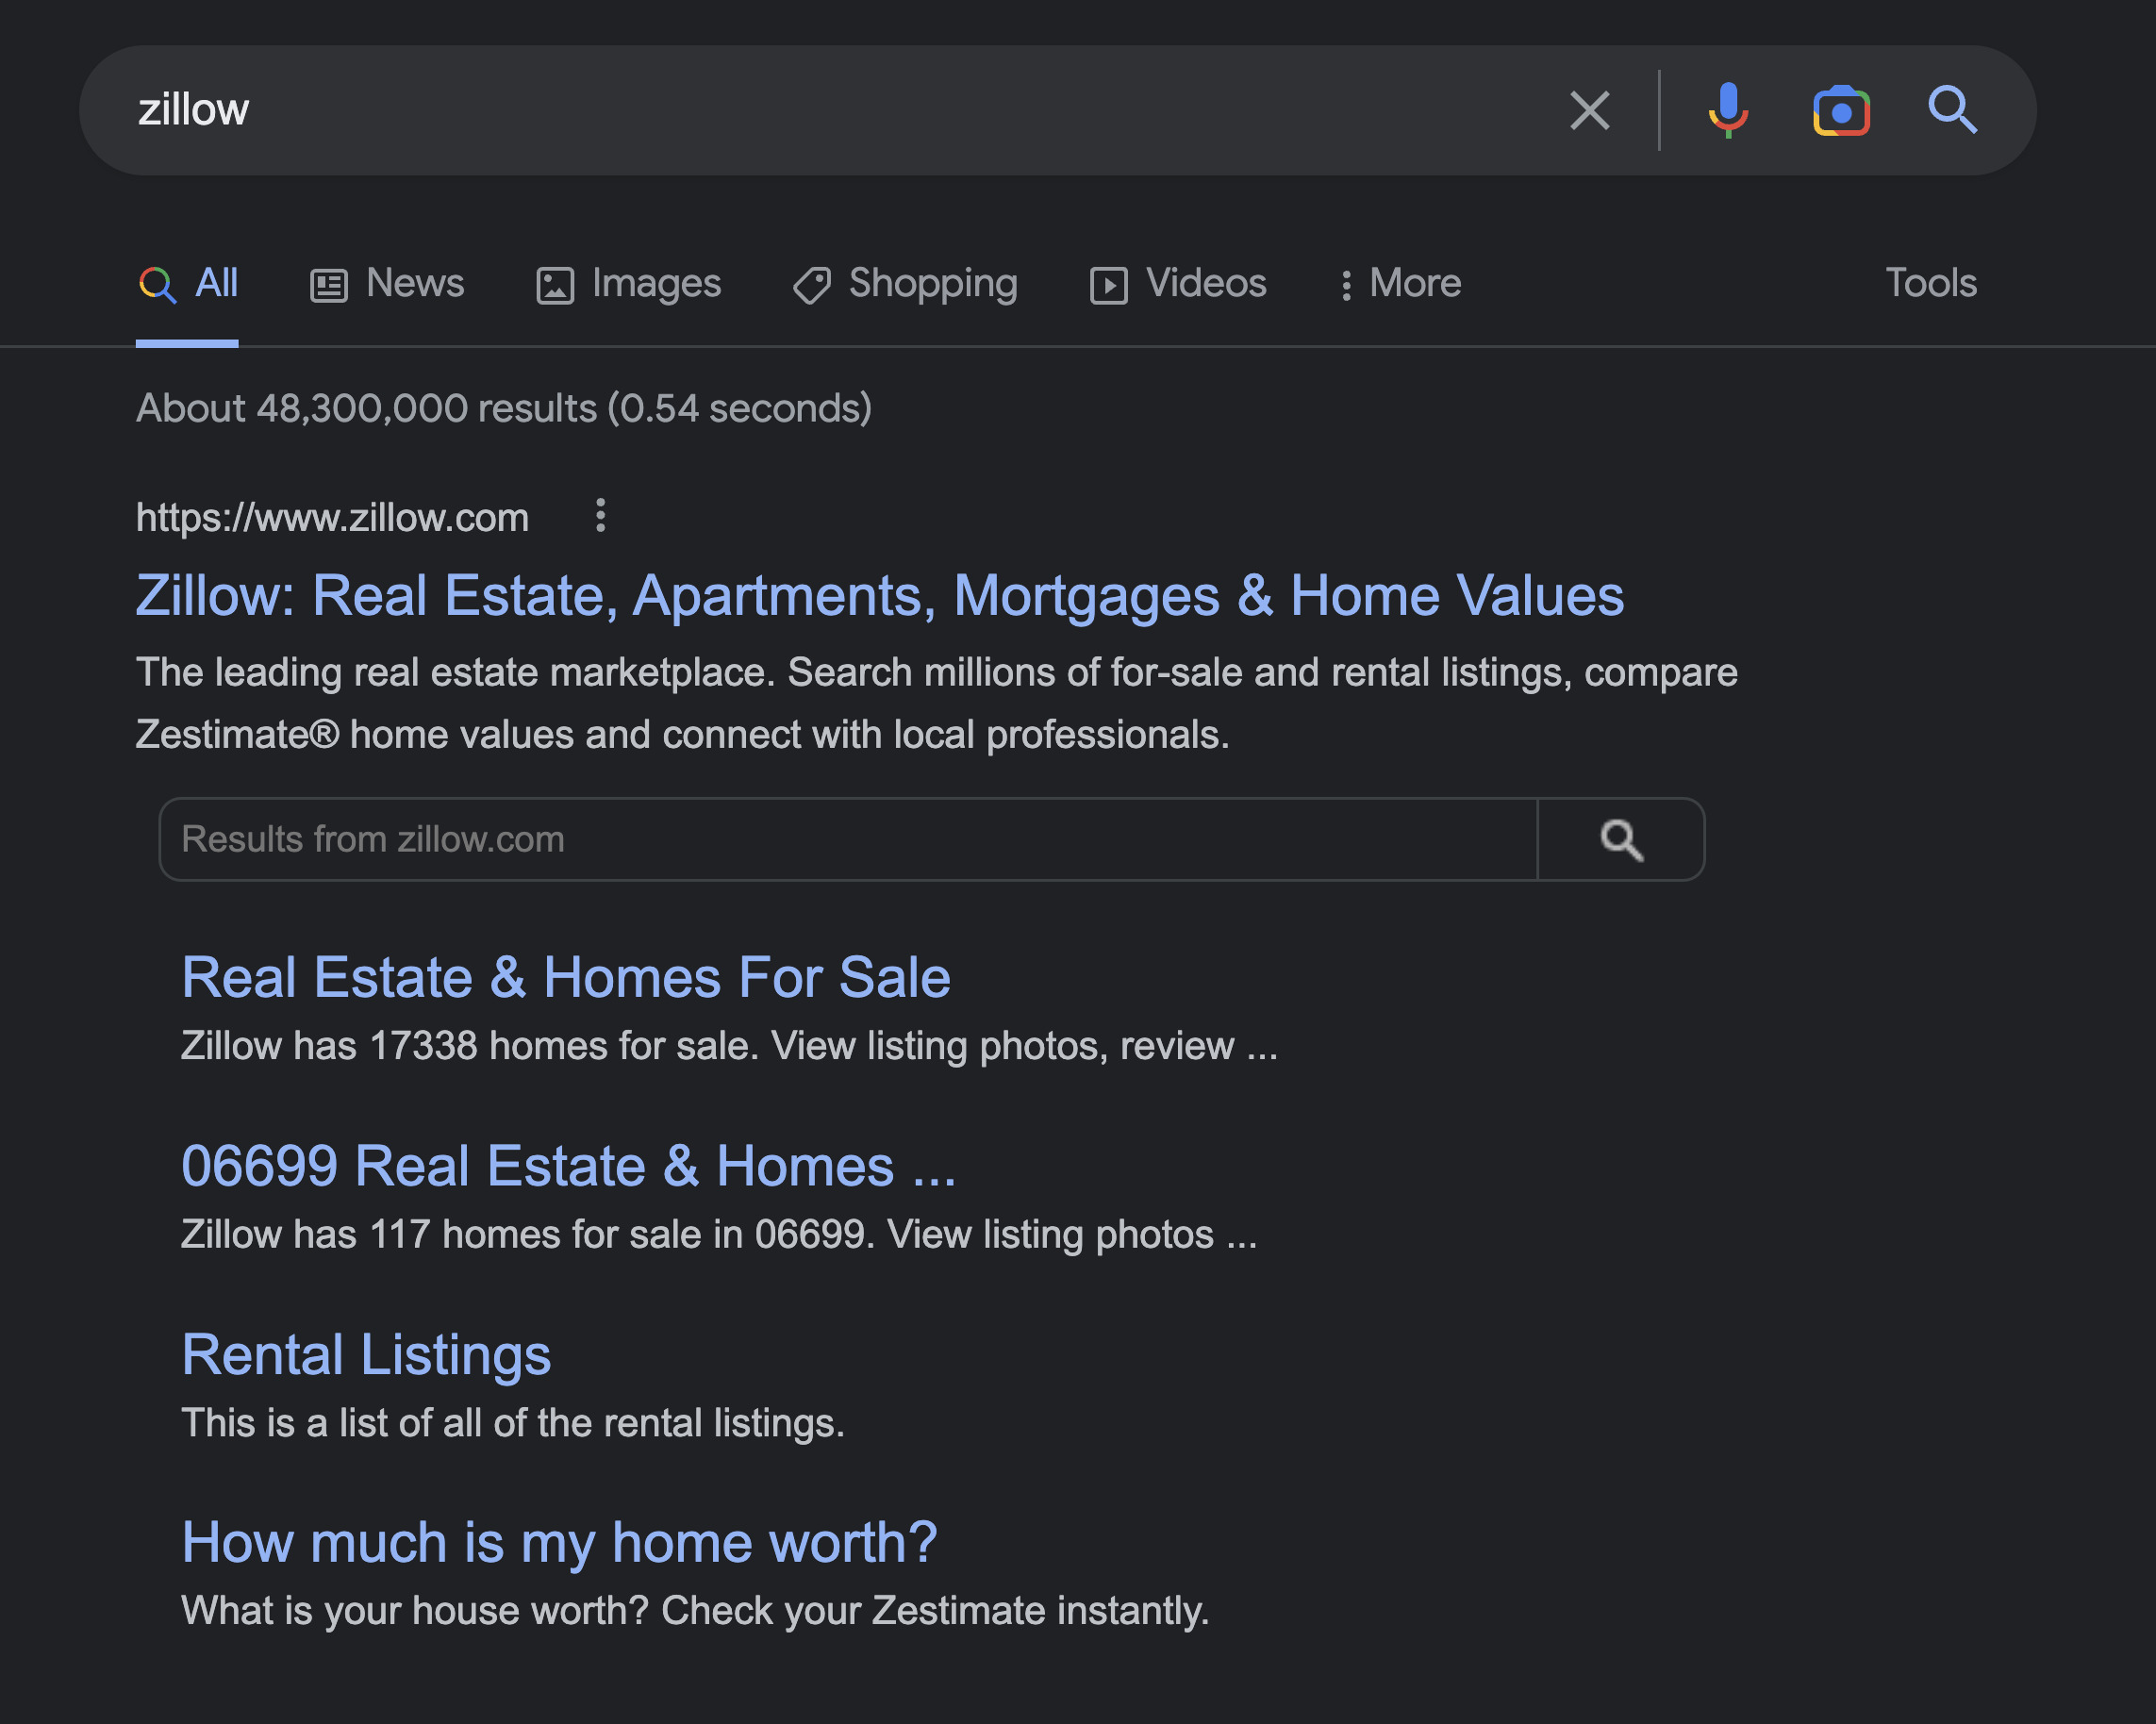
nositelinkssearchbox
Prevents Google from showing a search box as a part of your sitelinks.
<meta name="robots" content="nositelinkssearchbox">
indexifembedded
Allows Google to index content embedded through iframes or similar HTML tags on a page with a noindex directive. It only works when both directives are present, like this:
<meta name="robots" content="noindex, indexifembedded">
Google’s documentation nicely explains the use case here.
Using these directives
Most SEOs don’t need to go beyond the noindex and nofollow directives, but it’s good to know that there are other options. Keep in mind that all directives we talk about here are based on what Google supports. There are a few directives unique to other search engines, but they aren’t worth diving into.
Let’s check the comparison with Bing:
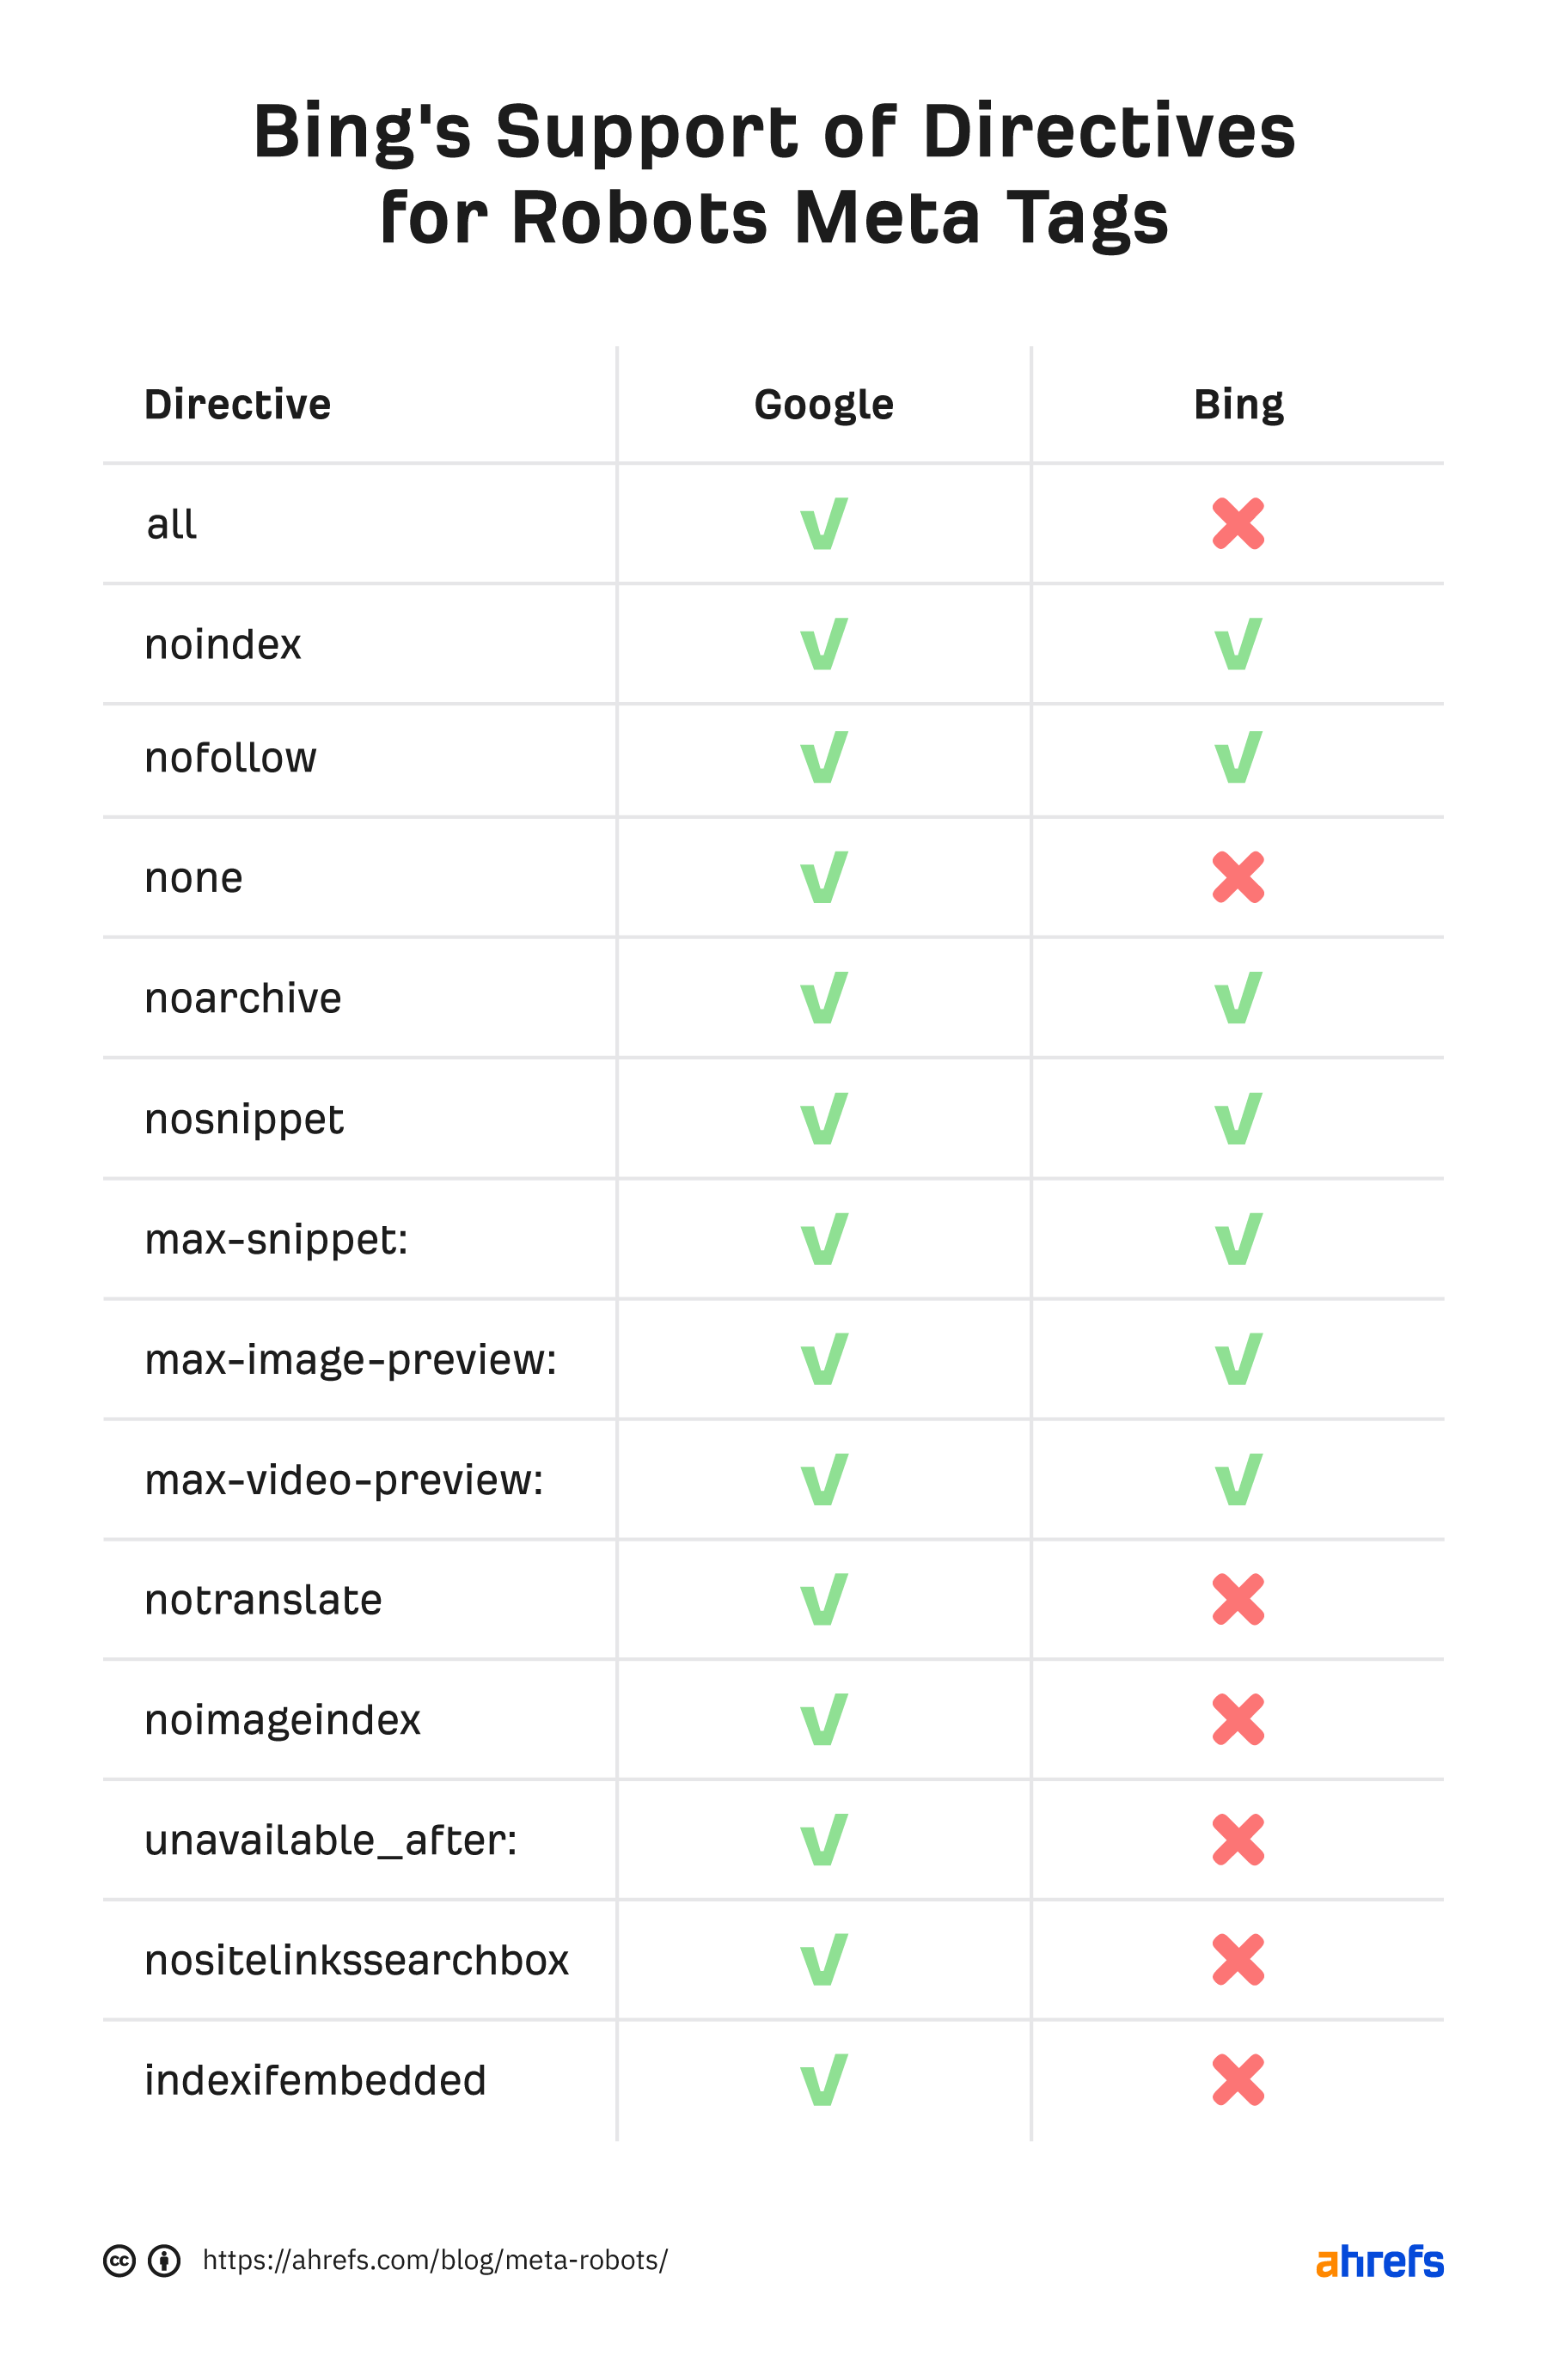
You can use multiple directives at once and combine them. But if they conflict (e.g., “noindex, index”) or one is a subset of another (e.g., “noindex, noarchive”), Google will use the most restrictive one. In these cases, it would be just “noindex”.
Now that you know what all these directives do and look like, it’s time to get to the actual implementation on your website.
Robots meta tags belong to the <head> section of a page. It’s pretty straightforward if you edit the code using HTML editors such as Notepad++ or Brackets. But what if you’re using a CMS with SEO plugins?
Let’s focus on the most popular option out there.
Implementing robots meta tags in WordPress using Yoast SEO
Go to the “Advanced” section below the editing block of each post or page. Set up the robots meta tag according to your needs. The following settings would implement “noindex, nofollow” directives.
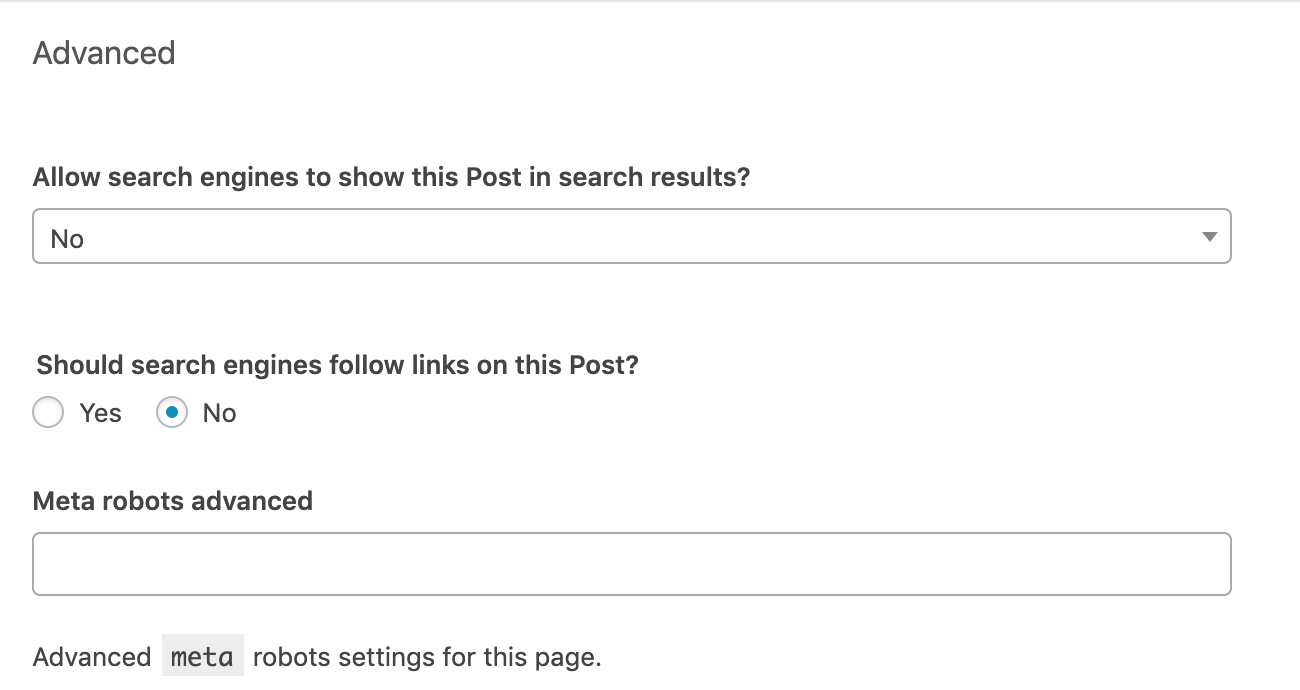
The “Meta robots advanced” row gives you the option to implement directives other than noindex and nofollow, such as noimageindex.
You also have the option to apply these directives sitewide. Go to “Search Appearance” in the Yoast menu. There you can set up meta robots tags on all posts, pages, or just on specific taxonomies or archives.

The robots meta tag is fine for implementing noindex directives on HTML pages here and there. But what if you want to prevent search engines from indexing files such as images or PDFs? This is when x-robots-tags come into play.
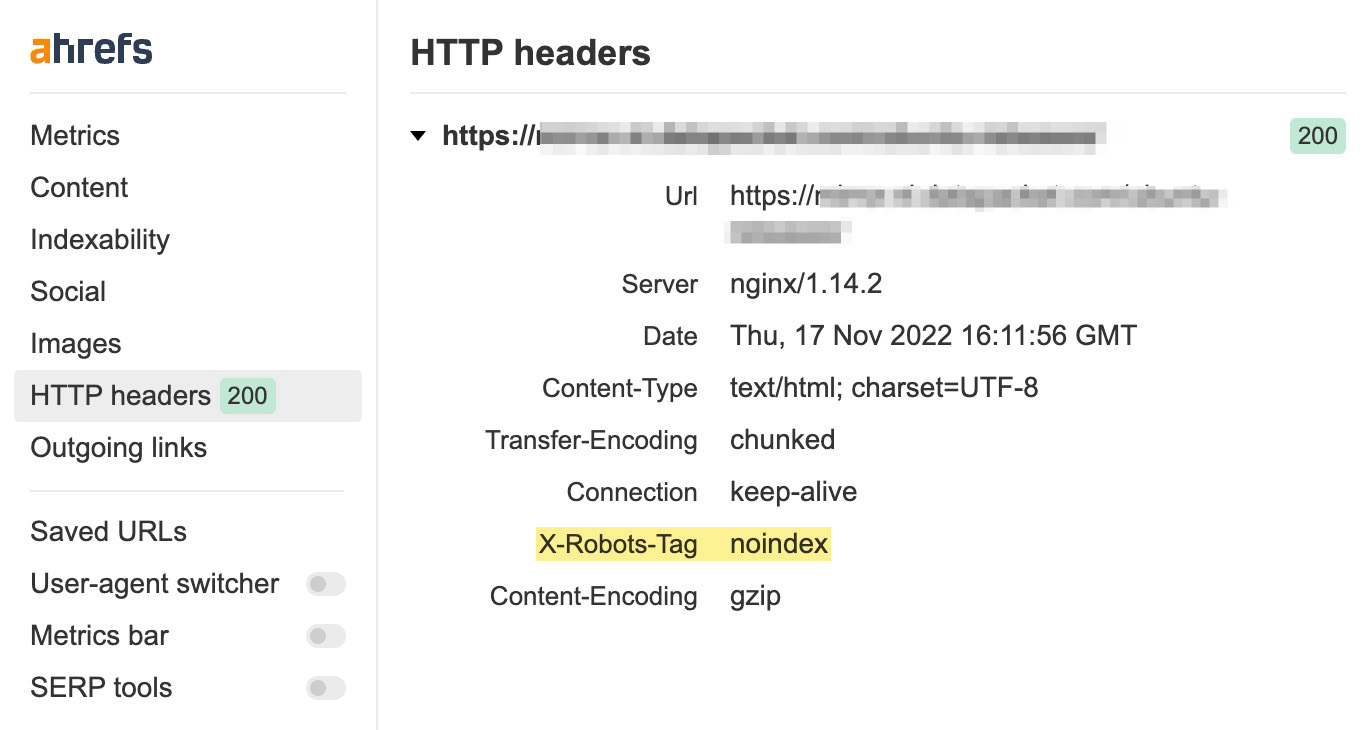
The X-Robots-Tag is an HTTP header sent from a web server. Unlike the meta robots tag, it isn’t placed in the HTML of the page. Here’s what it can look like:
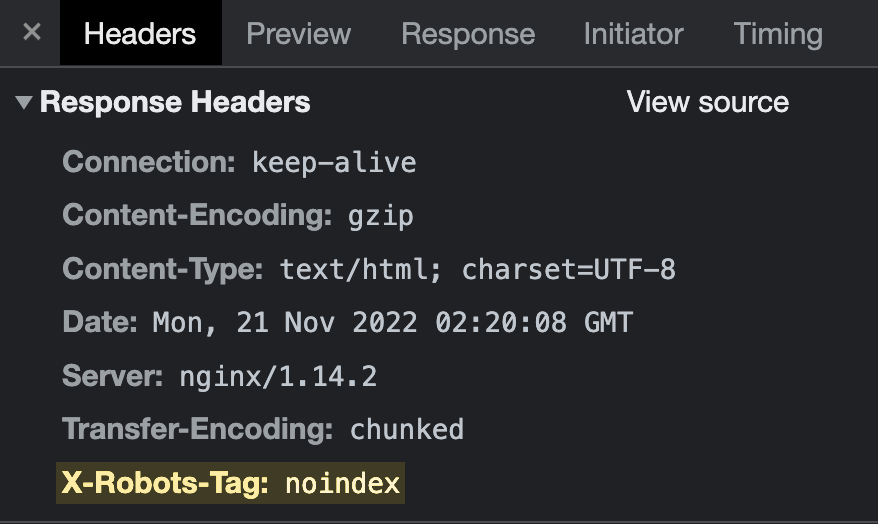
The easiest way to check HTTP headers is with the free Ahrefs SEO toolbar browser extension. Just head over to the HTTP header tab and see if the X-Robots-Tag is present:
The configuration depends on the type of web server you’re using and which pages or files you want to keep out of the index.
The line of code look like this:
Header set X-Robots-Tag “noindex, nofollow”
This example takes into account the most widespread server type—Apache. The most practical way of adding the HTTP header is by modifying the main configuration file (usually httpd.conf) or .htaccess files. Sounds familiar? This is the place where redirects also happen.
You use the same values and directives for the x-robots-tag as a meta robots tag. That said, implementing these changes should be left for the experienced. Backups are your friends because even a small syntax error can break the whole website.
If you use a CDN that supports serverless applications for Edge SEO, you can modify both robots meta tags and X-Robots-Tags on the edge server without making changes to the underlying codebase.
While adding an HTML snippet looks like the easiest and most straightforward option, it falls short in some cases.
Non-HTML files
You can’t place the HTML snippet into non-HTML files such as PDFs or images. X-Robots-Tag is the only way.
The following snippet (on an Apache server) would configure noindex HTTP headers on all PDF files on the site.
<Files ~ "\.pdf$">
Header set X-Robots-Tag "noindex"
</Files>
Applying directives at scale
If you need to noindex a whole (sub)domain, subdirectory, pages with certain parameters or anything else that requires bulk editing, use x-robots-tags. It’s easier.
HTTP header modifications can be matched against URLs and file names using regular expressions. Complex bulk editing in HTML using the search and replace function would usually require more time and computing power.
Traffic from search engines other than Google
Google supports both meta robots tags and x-robots-tags, but this isn’t the case for all search engines.
For example, Seznam, a Czech search engine only supports robots meta tags. If you want to control how this search engine crawls and indexes your pages, using x-robots-tags won’t work. You need to use the HTML snippets.
You want to show all valuable pages, avoid duplicate content, issues and keep specific pages out of the index. If you manage a huge website then crawl budget management is another thing to pay attention to.
Let’s have a look at the most common mistakes people make regarding robots directives.
Mistake #1: Adding noindex directives to pages disallowed in robots.txt
Never disallow crawling of content that you’re trying to get deindexed in robots.txt. Doing so prevents search engines from recrawling the page and discovering the noindex directive.
If you feel you may have made that mistake in the past, crawl your site with Ahrefs Webmaster Tools for free. Look for pages with “Noindex page receives organic traffic” errors.
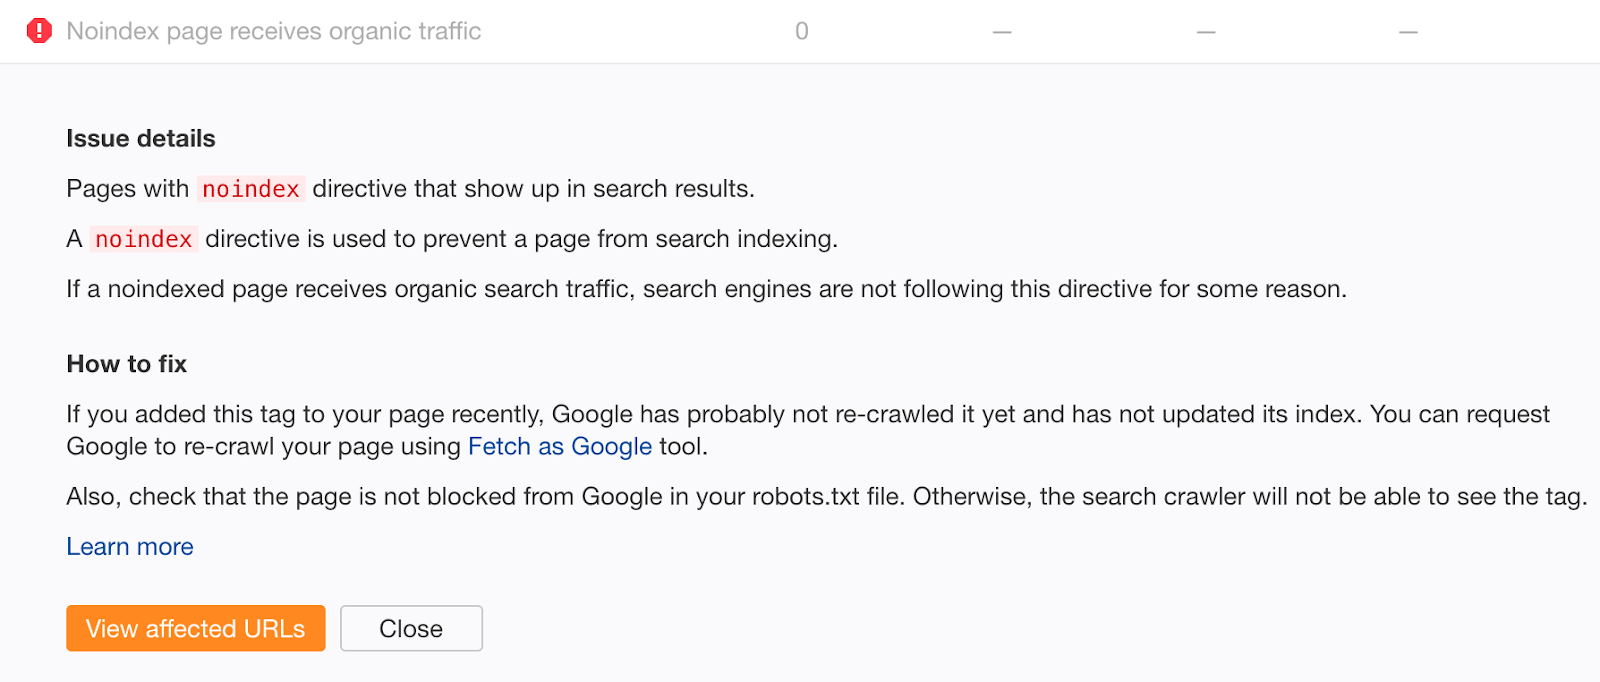
Noindexed pages that receive organic traffic are clearly still indexed. If you didn’t add the noindex tag recently, chances are this is due to a crawl block in your robots.txt file. Check for issues and fix them as appropriate.
Mistake #2: Bad sitemaps management
If you’re trying to get content deindexed using a meta robots tag or x-robots-tag, don’t remove it from your sitemap until it’s been successfully deindexed. Otherwise, Google may be slower to recrawl the page.
@nishanthstephen generally anything you put in a sitemap will be picked up sooner— Gary “鯨理” Illyes (@methode) 13 October 2015
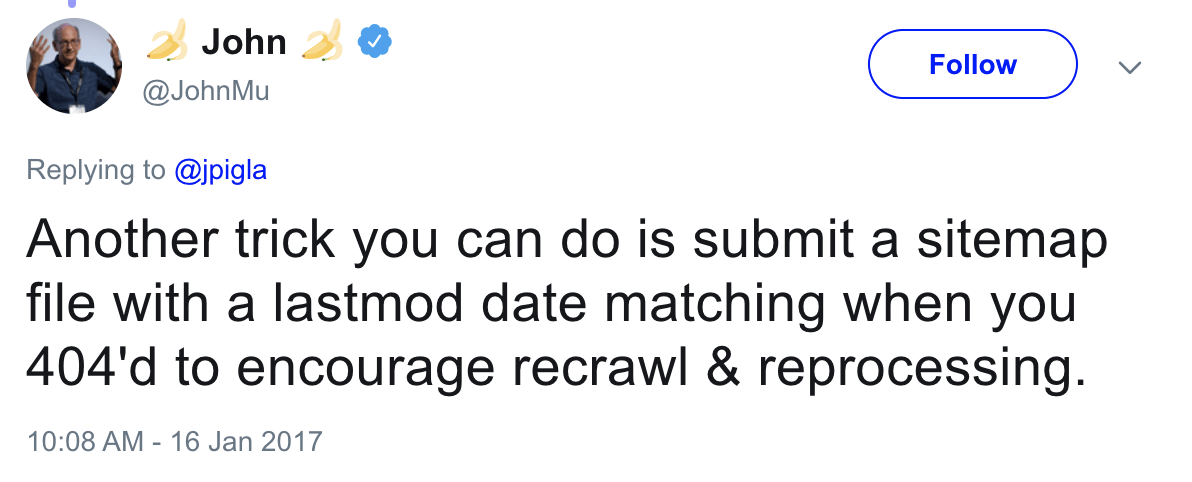
To potentially speed up the deindexing process further, set the lastmod date in your sitemap to the date you added the noindex tag. This encourages recrawling and reprocessing.
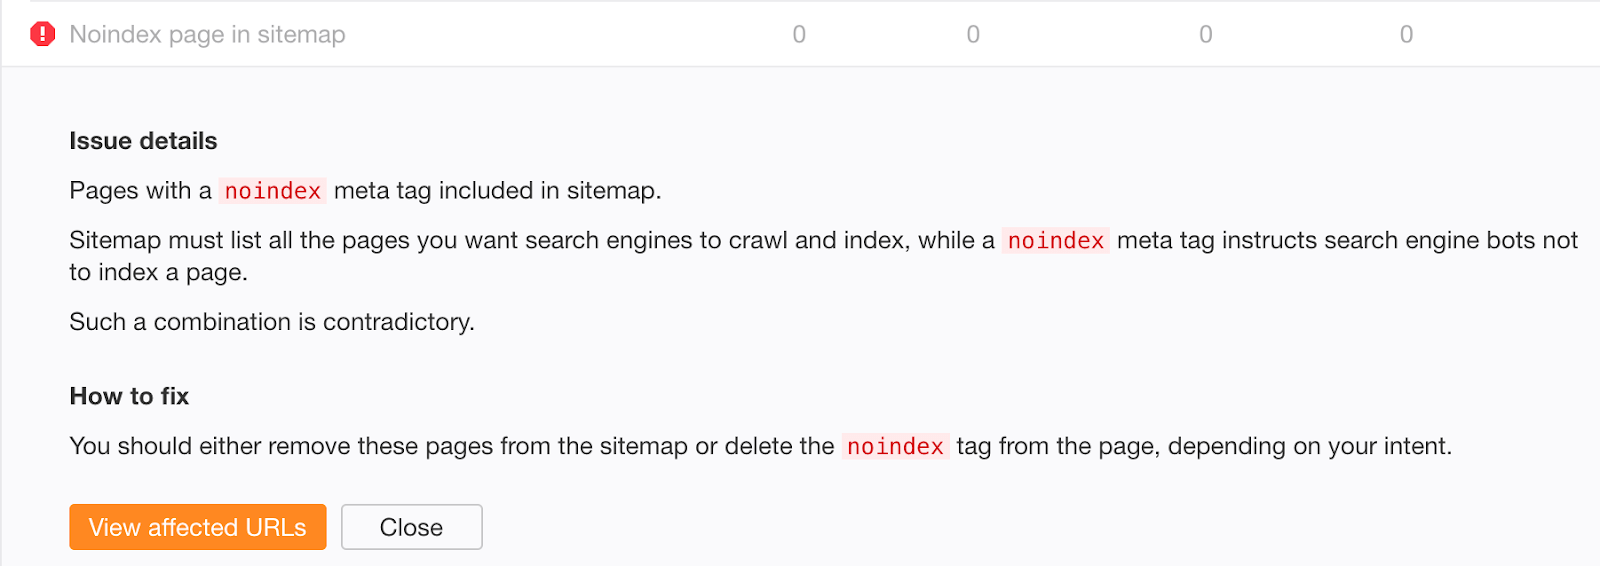
Don’t include noindexed pages in your sitemap in the long-term. Once content has been deindexed, remove it from your sitemap.
If you’re worried that old, successfully deindexed content may still exist in your sitemap, check the “Noindex page in sitemap” error in Ahrefs Webmaster Tools.
Mistake #3: Not removing noindex directives from the production environment
Preventing robots from crawling and indexing anything in the staging environment is a good practice. However, it sometimes gets pushed into production, forgotten, and your organic traffic plunges.
Even worse, the organic traffic drop might not be that noticeable if you’re involved in a site migration using 301 redirects. If the new URLs contain the noindex directive or are disallowed in robots.txt, you’ll still receive organic traffic from the old ones for some time. It can take Google up to a few weeks to deindex the old URLs.
Whenever there are such changes on your website, keep an eye on the noindex warnings in the Indexability report:
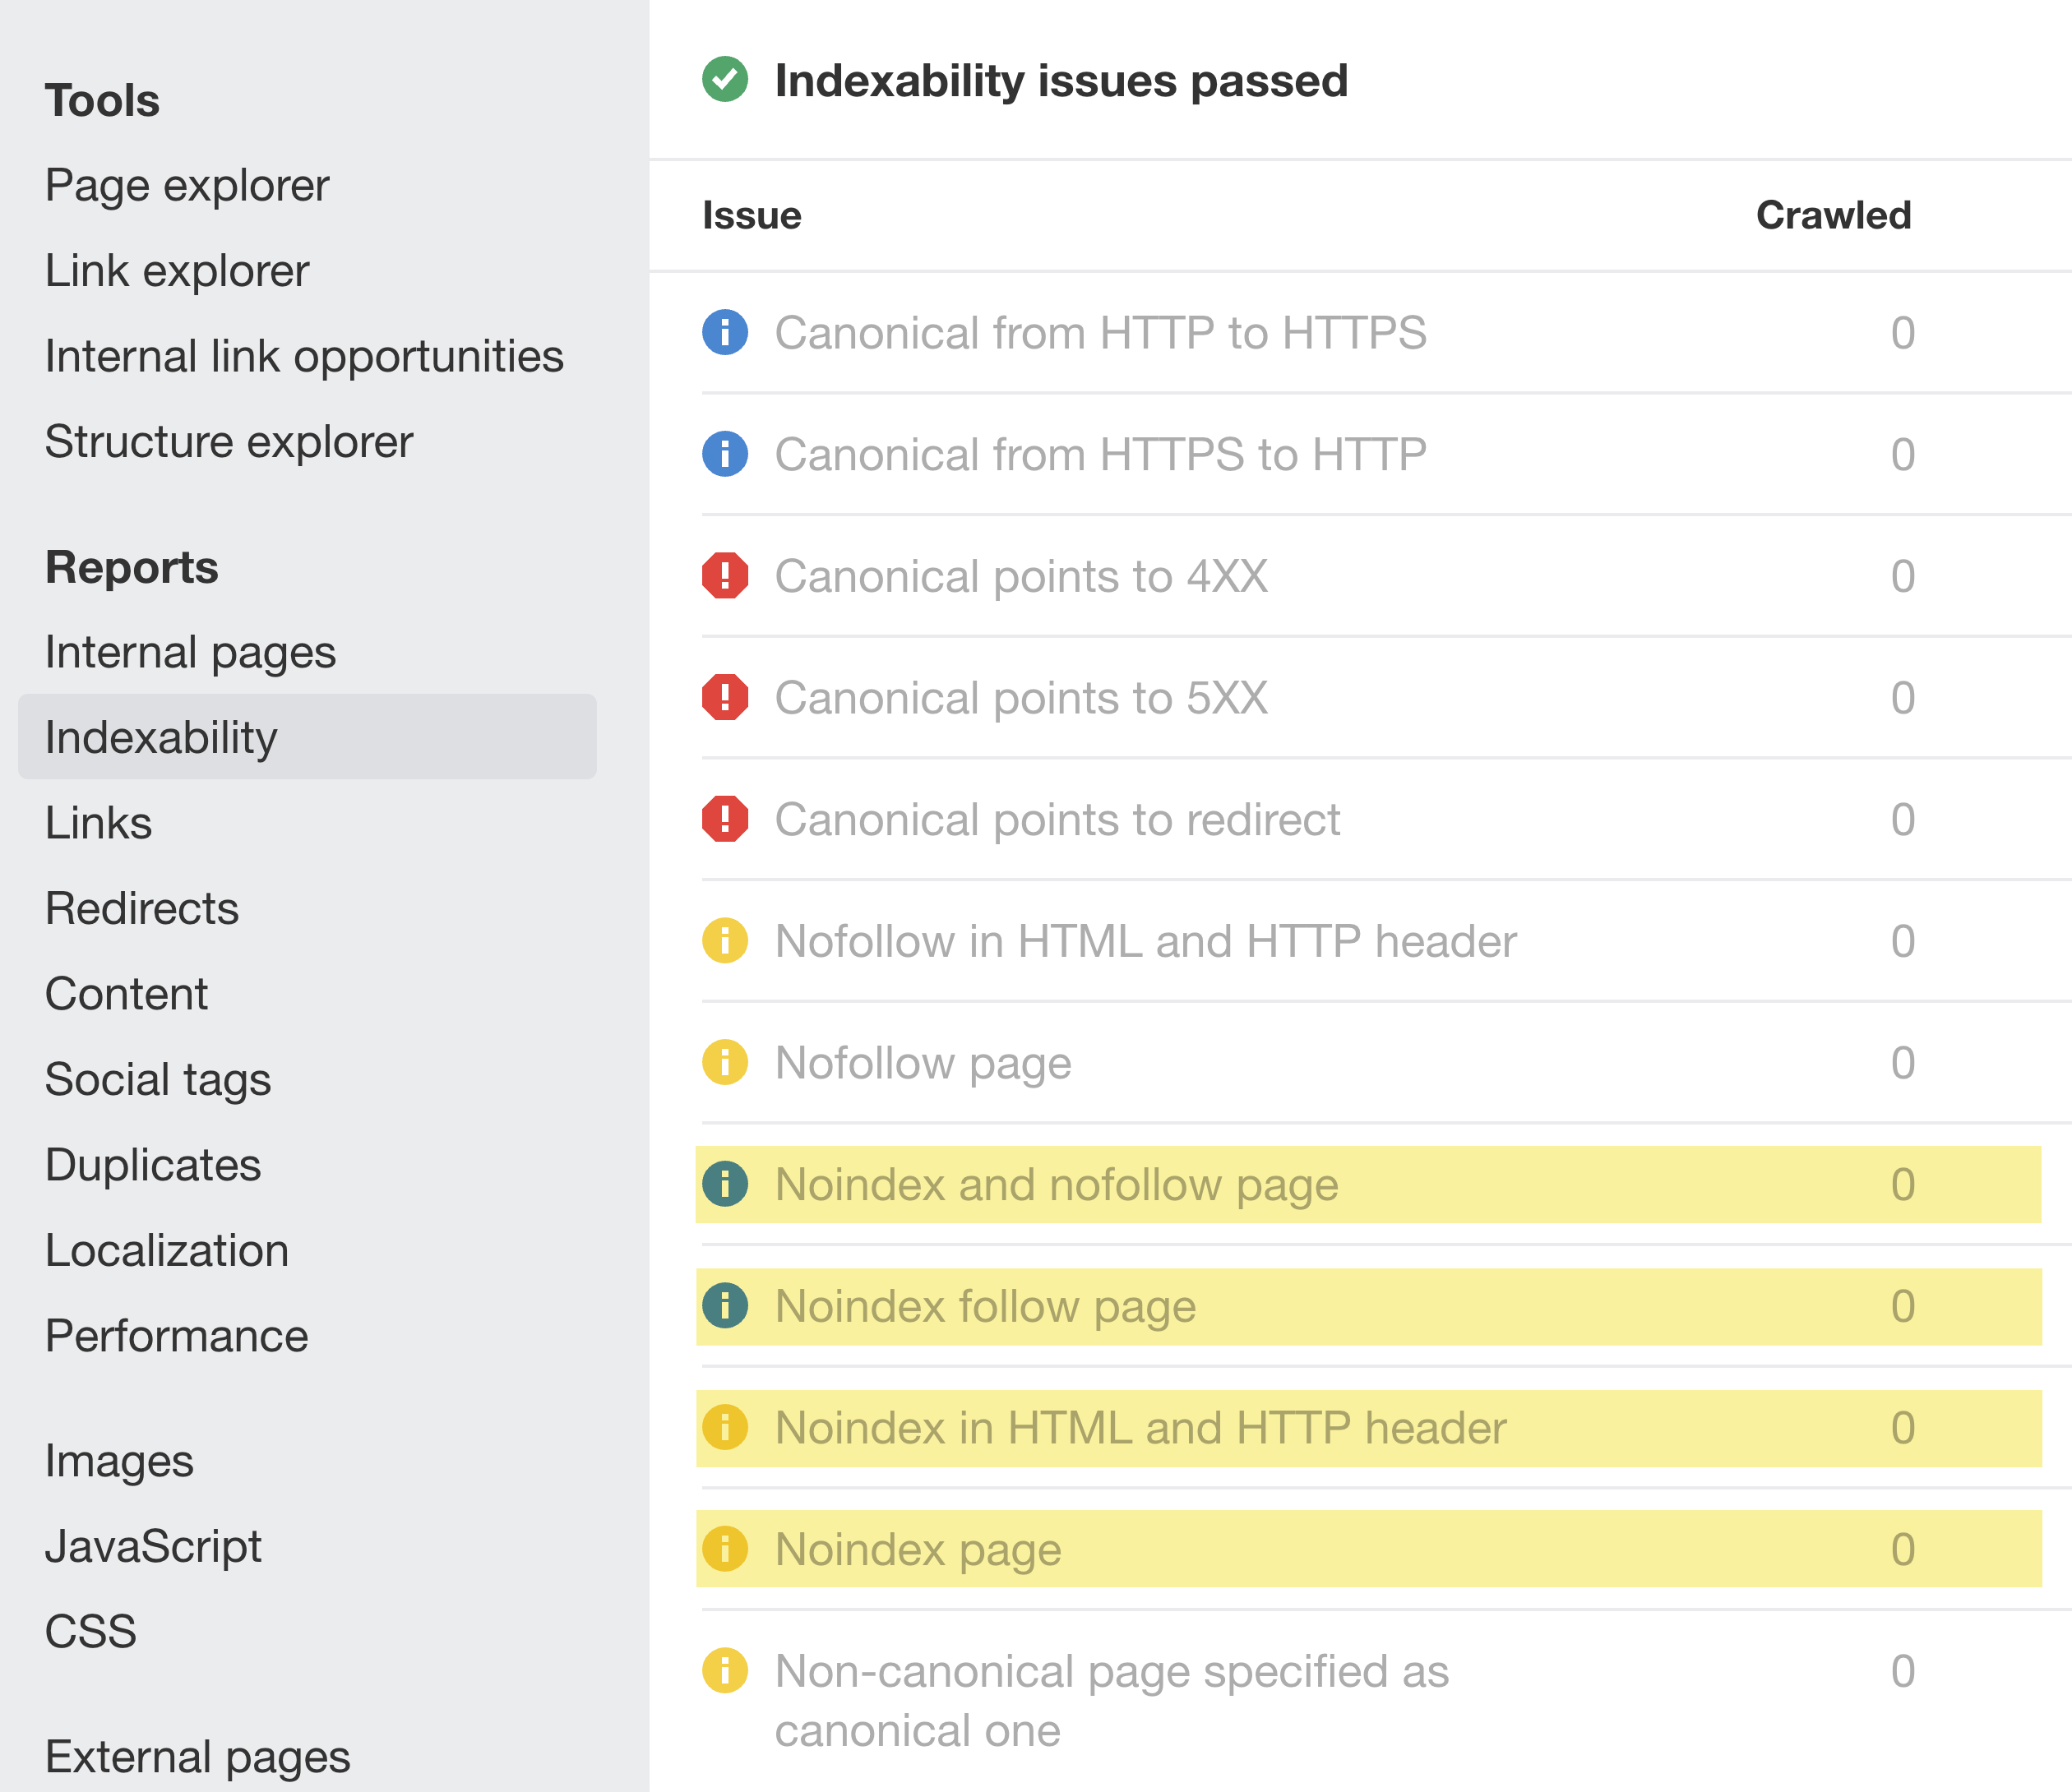
To help prevent similar issues in the future, enrich the dev team’s checklist with instructions for removing disallow rules from robots.txt and noindex directives before pushing to production.
Mistake #4: Adding “secret” URLs to robots.txt instead of noindexing them
Developers often try to hide pages about upcoming promotions, discounts, or product launches by disallowing access to them in the site’s robots.txt file. This is bad practice because humans can still view a robots.txt file. As such, these pages are easily leaked.
Fix this by keeping “secret” pages out of robots.txt and noindexing them instead.
Final thoughts
Properly understanding and managing the crawling and indexing of your website is the cornerstone of SEO. It’s nothing really complicated. Well, at least in comparison to other tricky stuff within the field of technical SEO.
I hope that you’re now prepared to apply the best practices for long-term solutions at scale.
Got any questions? Let me know on Twitter.